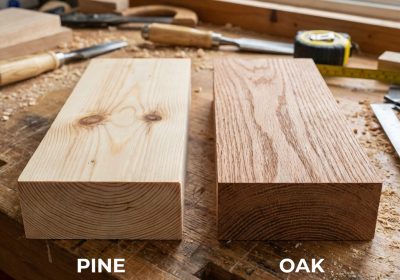
Every serious woodworker works from a solid bench, and building your own is the first project worth tackling. A homemade workbench doesn’t need to be fancy — it needs to be flat, heavy, and strong enough to take a hammering. This build uses standard construction pine from any hardware store, costs around $50 in materials, and can be completed in a weekend. No special joinery required: just pocket hole screws, construction screws, and wood glue.
Tools You’ll Need
- Circular saw or miter saw
- Drill/driver
- Pocket hole jig (Kreg or equivalent) — optional but recommended
- Tape measure and square
- Clamps (at least 4)
- Sandpaper (80-grit and 120-grit)
- Safety glasses and hearing protection
Materials List
- 7 × 2×4 pine studs at 2.4 m length (for top, legs, and stretchers)
- 1 × sheet of 19 mm particleboard or plywood, 600 × 1800 mm (optional lower shelf)
- 75 mm construction screws × 50
- 50 mm pocket hole screws × 30 (if using pocket hole jig)
- Wood glue
- 4 × M10 coach bolts, 100 mm (for optional wall mounting)
- Sandpaper: 80-grit, 120-grit
Total cost: approximately $45–$55 depending on your hardware store and whether you add a shelf.
Cut List
All timber is 2×4 construction pine (actual size 38 × 90 mm). Final bench dimensions: 1800 mm long × 600 mm deep × 900 mm tall (standard bench height — adjust legs for your comfortable working height).
| Part Name | Qty | Thickness (mm) | Width (mm) | Length (mm) | Notes |
|---|---|---|---|---|---|
| Benchtop Board | 6 | 38 | 90 | 1800 | Laid flat, glued edge-to-edge |
| Leg | 4 | 38 | 90 | 862 | Allows for 38 mm top thickness |
| Long Apron (front & back) | 2 | 38 | 90 | 1724 | Sits between legs at top |
| Short Apron (ends) | 2 | 38 | 90 | 524 | Sits between legs at top |
| Long Lower Stretcher | 2 | 38 | 90 | 1724 | 200 mm from floor |
| Short Lower Stretcher | 2 | 38 | 90 | 524 | 200 mm from floor |
| Shelf Panel | 1 | 19 | 524 | 1724 | Plywood or particleboard, optional |
Step-by-Step Build Instructions
Step 1: Cut All Pieces to Length
Using your miter saw or circular saw with a guide, cut all pieces to the lengths in the cut list. Check each piece with a square after cutting — a square end is critical for tight joints. Label each piece lightly in pencil.
Step 2: Lay Out and Mark the Legs
Mark each leg at 200 mm from the bottom (for the lower stretcher position) and at the top where the aprons will attach. The aprons sit flush with the top of the legs, so the top of the leg and the top edge of the apron will be at the same height.
Step 3: Drill Pocket Holes (or Pre-Drill)
If using a pocket hole jig, drill pocket holes into both ends of every apron and stretcher piece. If you don’t have a pocket jig, pre-drill pilot holes through the legs into the apron ends at an angle (toe-screwing) or use a simple butt joint with 75 mm screws and glue.
Step 4: Assemble the Two End Frames
Apply wood glue to the short apron ends and attach them between two legs using pocket screws or construction screws. Use a square to confirm 90-degree corners before the glue sets. Clamp and let dry for at least 20 minutes before moving on. Repeat for the second end frame. These two H-shaped assemblies form the ends of the bench.
Step 5: Connect the End Frames with Long Aprons
Stand both end frames upright, apply glue to the long apron ends, and attach the two long aprons between them. Check that the whole frame is square by measuring diagonally corner to corner — both diagonal measurements should be equal. Adjust if needed before the glue sets.
Step 6: Attach the Lower Stretchers
With the frame still upright, attach the lower stretchers 200 mm from the floor. These provide racking resistance and support the optional shelf. Pocket screw or screw-and-glue from inside.
Step 7: Build the Benchtop
Lay all six top boards side by side on a flat surface. Apply wood glue to each edge and clamp them together. If you have bar clamps, this is their moment. Let the top dry for at least one hour before handling. Once dry, use a hand plane or belt sander to flatten any high spots between boards.
Step 8: Attach the Top to the Frame
Flip the glued-up top onto the frame and align it flush at both ends. Drive 75 mm screws down through the top boards into the long aprons — two screws per apron board, staggered slightly to avoid splitting. You can also use L-brackets on the inside of the aprons for a cleaner look with no visible screw holes on top.
Step 9: Add the Lower Shelf
Drop the shelf panel onto the lower stretchers. It doesn’t need to be fixed — its own weight keeps it in place and you can lift it out to clean. If you want it fixed, secure it with a few 40 mm screws from underneath through the stretchers.
Step 10: Level the Legs
Place the finished bench on the floor and check it for rock. If one leg is slightly short, don’t shim — instead, mark the high legs and trim them down. Run a pencil on a flat block to scribe a consistent line around all four legs, then trim to the line with a handsaw. For permanent installation on a garage floor (which is rarely perfectly level), fit adjustable levelling feet — these thread into a T-nut driven into the bottom of each leg.
Optional: Wall-Mount for Stability
If the bench will sit against a wall, bolting it to the wall studs eliminates all racking movement. Drill through the back long apron into the wall studs using M10 coach bolts. Two bolts at stud locations will make the bench completely immovable — essential if you’re planing or hand-sawing with force.
Finishing the Bench
Sand all edges and faces with 80-grit, then 120-grit. A simple coat of boiled linseed oil seals the top and reduces grain raise from moisture. Don’t use a film finish like polyurethane on a workbench top — it chips, and you’ll be chiselling and planing on this surface. An oiled top is easy to sand back and re-oil when needed.
Once you’ve got a solid workbench, every other project becomes easier. If you want plans for what to build on it, Ted’s Woodworking has 16,000 step-by-step plans for everything from cabinets and garden furniture to toys and workshop storage — all with detailed cut lists like the one above.