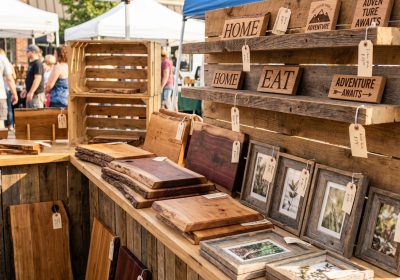
A wooden toolbox is the perfect first project. It uses one type of timber, requires only basic cuts, teaches you to measure and mark accurately, and gives you something genuinely useful at the end. This classic open-top tray design with a dowel handle can be built in about two hours with a handful of hand tools or power tools — no special jigs required. Materials come to under $20.
What You’ll Learn Building This Toolbox
- Measuring and marking square lines
- Cutting straight and accurate
- Drilling clean holes without blowout
- Gluing and screwing for a strong joint
- Finishing wood for a clean result
These five skills appear in virtually every woodworking project you’ll ever build. Get them solid on a toolbox, and you’ll hit the ground running on furniture.
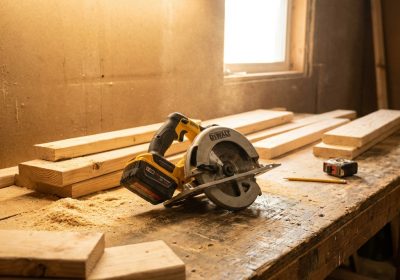
Tools Required
- Tape measure and pencil
- Square
- Handsaw or circular saw
- Drill with 25 mm spade or Forstner bit (for handle holes), and a 3 mm pilot bit
- Clamps × 2
- Sandpaper: 80-grit and 120-grit
Materials List
- 1 × 19 × 140 mm pine DAR (1×6), 1.8 m length — for sides, ends, bottom
- 1 × 25 mm diameter hardwood dowel, 420 mm length — handle
- 30 mm screws × 16 (or finish nails if you prefer)
- Wood glue
- Sandpaper: 80 and 120-grit
- Optional: paint, stain, or exterior decking oil for finish
Total cost: approximately $12–$18 depending on your local hardware store prices and whether you already have screws and sandpaper.
Cut List
Finished toolbox dimensions: 400 mm long × 180 mm wide × 140 mm deep. All timber is 19 × 140 mm pine DAR unless noted.
| Part Name | Qty | Thickness (mm) | Width (mm) | Length (mm) | Material |
|---|---|---|---|---|---|
| Long Side | 2 | 19 | 140 | 400 | 19 × 140 mm pine DAR |
| Short End | 2 | 19 | 140 | 142 | 19 × 140 mm pine DAR |
| Bottom | 1 | 19 | 140 | 362 | 19 × 140 mm pine DAR |
| Handle Dowel | 1 | 25 mm dia. | — | 420 | 25 mm hardwood dowel |
Note on end dimensions: The short ends sit inside the long sides. Their length (142 mm) equals the internal width of the box (180 mm minus two side thicknesses of 19 mm each = 142 mm). The bottom (362 mm) sits inside the long sides and rests on top of the short ends, so its length is 400 mm minus two side thicknesses = 362 mm.
Step-by-Step Build Instructions
Step 1: Cut All Pieces
Measure and mark all five pieces on your 1×6 board using a square. Always mark with a pencil line, then cut to the waste side of the line — just outside it, not through it. Check each piece after cutting: both ends should be perfectly square.
Step 2: Mark and Drill the Handle Holes
On each short end piece, mark the centre point 70 mm from the top edge and centred across the 142 mm width (at 71 mm). Clamp the piece to a scrap board before drilling to prevent blowout on the exit side. Drill slowly with a 25 mm spade or Forstner bit. Test the dowel in the hole — it should fit snugly but not require force.
Step 3: Thread the Handle
Slide the dowel through both end pieces before assembly. It’s much harder to thread it after the box is glued up. Hold the end pieces against the long sides temporarily to check the fit.
Step 4: Attach the Short Ends to the Bottom
Apply a thin bead of glue along the bottom edge of each short end. Clamp the bottom panel between the two ends so the bottom board sits flush. Drive two 30 mm screws through the bottom into each end piece. Pre-drill pilot holes first to prevent splitting — this is thin pine and it will split without a pilot hole near the end grain.
Step 5: Attach the Long Sides
Apply glue to the outer faces of the short end pieces and the outer edges of the bottom panel. Bring one long side into place, align it flush with the ends and bottom, and clamp. Drive four screws through the long side into the end pieces (two per end) and two screws through the long side into the bottom. Repeat for the opposite long side.
Step 6: Secure the Handle
With the box assembled, check that the dowel handle sits centred between both ends. Drill a 3 mm pilot hole from outside each end piece into the end of the dowel and drive a single 30 mm screw to pin it in place on each side. Alternatively, apply a small dab of wood glue at each end of the dowel where it meets the end piece — this is sufficient for a toolbox that won’t be overloaded.
Step 7: Sand and Finish
Sand all outer faces and the top edges with 80-grit to remove any tear-out or pencil marks, then follow with 120-grit for a smooth finish. Round off all sharp edges and corners with a light pass of 120-grit sandpaper held at 45 degrees. A coat of decking oil or outdoor paint will protect the timber if the box will live in a garage or shed.
Variation: Add a Lid to Make a Storage Box
To convert the open toolbox into a lidded storage box, cut one more panel of 19 × 140 mm pine at 400 mm long. Add a 38 mm piano hinge along one long top edge and attach the lid to the back long side of the box. A small barrel bolt or hasp on the front keeps it closed. This adds about 20 minutes and $8–$12 in hardware costs, and turns the project into a toy chest, craft storage box, or garden seat.
Once you’ve nailed the toolbox, you’re ready to take on furniture. Ted’s Woodworking has step-by-step plans for over 16,000 projects — from beginner tray builds like this one all the way to full bedroom sets and timber-frame garden structures.