This post may contain affiliate links. If you purchase through our links we may earn a small commission at no extra cost to you. Learn more.
So you want to start woodworking — but you’re not sure where to begin. You don’t have a shop full of tools. You’re not sure what wood to buy. And every YouTube video seems to assume you already know what a mortise is.
This guide is for you. By the end, you’ll know exactly which tools to buy first (and on what budget), which projects to start with, how to read a woodworking plan, and the five mistakes that trip up almost every beginner. Skip the mistakes and your first project looks better than it has any right to.
What Tools Do You Actually Need to Start?
The internet will tell you that you need a $2,000 table saw before you can do anything useful. That’s wrong. Here’s what you actually need to start building real projects — everything on this list together comes to under $160, and you can build a proper coffee table or garden planter with every item on it.
The Non-Negotiables
- Cordless drill/driver (18V) — A basic 18V drill from DEWALT, Ryobi, or Makita does 90% of the work. Look for a combo kit that includes two batteries. (~$60–$80)
- Tape measure (25 ft, with a lock) — Don’t go smaller. You want the extra reach for sheet goods. (~$10)
- Speed square — Marks 90° and 45° cuts. More useful than it looks. (~$8)
- Bar clamps (4–6 pieces) — You will always need more clamps than you think. A set of 6″ bar clamps or F-clamps to start. (~$25–$35)
- Jigsaw — Cuts curves and straight lines and is forgiving for beginners. Far more versatile than a hand saw as a first saw. (~$40–$60)
- Sandpaper assortment — 80, 120, 180, and 220 grit. (~$10)
- Wood glue (Titebond II) — The standard. One bottle covers dozens of projects. (~$8)
Beginner Tool Comparison Table
| Tool | Budget pick | Mid-range pick | Do you need it day one? |
|---|---|---|---|
| Drill/driver | Ryobi 18V (~$60) | DEWALT DCD777 (~$99) | Yes — before anything else |
| Jigsaw | Ryobi JS481LG (~$45) | Bosch JS120BN (~$80) | Yes — your first saw |
| Circular saw | Ryobi PBLCS300B (~$65) | DEWALT DCS565B (~$110) | After your 2nd or 3rd project |
| Pocket hole jig | Kreg 320 (~$35) | Kreg 720 (~$99) | Yes — transforms your joints |
| Random orbital sander | Ryobi PCE800 (~$30) | Ridgid R2611 (~$55) | After project 1 |
| Miter saw | Metabo HPT C10FCGS (~$150) | DEWALT DWS779 (~$389) | Not yet — jigsaw first |
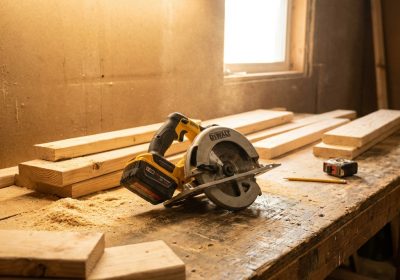
Your First Upgrade: The Circular Saw
Once you’ve built a couple of projects, a circular saw opens up everything. You can rip plywood, cut boards to length, and tackle furniture and shed projects that are impossible with a jigsaw alone. A budget circular saw runs $50–$80 and is the single best upgrade a beginner can make after their first two projects.
The Game-Changer: A Pocket Hole Jig
A pocket hole jig lets you join two pieces of wood with angled screws — no complex joinery, no router, no experience required. The Kreg 320 costs around $35 and makes furniture-quality joints that are genuinely strong. (Note: the older Kreg R3 has been discontinued — the 320 is the current equivalent and is better in every way.) If you buy one “extra” tool in your first three months, make it this one.
The 5 Best First Projects — Ranked by Difficulty
Starting with the right project matters more than having the right tools. These five builds are forgiving, genuinely useful, and teach you the core skills you need for everything else. They’re listed from easiest to hardest — work through them in order.
| Project | Difficulty | Skills learned | Materials cost | Build time |
|---|---|---|---|---|
| Sawhorse / simple workbench | 2/5 | Measuring, crosscuts, assembly | $15–$25 | 2 hours |
| Wooden toolbox | 2/5 | Consistent cuts, drilling angles | $10–$20 | 2–3 hours |
| Garden planter box | 2/5 | Equal lengths, square corners | $20–$35 | 2–3 hours |
| Coffee table (4×4 legs, 2×6 top) | 3/5 | Pocket holes, base assembly, finishing | $40–$65 | 4–6 hours |
| Small 8×6 storage shed | 4/5 | Wall framing, roofing, large-scale layout | $400–$600 | 2–3 weekends |
1. A Simple Sawhorse or Workbench (Difficulty: 2/5)
Before you build anything else, build something to work on. A basic sawhorse from 2×4s needs just a saw, a drill, and a handful of screws. It takes about two hours and teaches you the fundamentals — how to measure accurately, make repeatable cuts, and drive screws without splitting pine. You’ll use it for every project after this one.
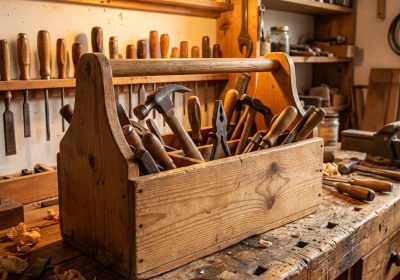
2. A Wooden Toolbox (Difficulty: 2/5)
A classic first project for good reason. You’ll learn to cut boards to the same length repeatedly, drill at consistent angles, and deal with the reality that wood doesn’t always behave perfectly. It doesn’t matter if yours looks a little rough — it’s a toolbox. Rough is fine.
3. A Garden Planter Box (Difficulty: 2/5)
Great outdoors and very forgiving of imprecise cuts. Cedar or pressure-treated pine is affordable and weathers well. You’ll practice measuring for equal lengths, assembling square corners, and using clamps — skills that carry directly into every furniture project.
4. A Coffee Table (Difficulty: 3/5)
Your first “real” furniture piece. A simple coffee table with 4×4 legs and 2×6 top boards can be built for under $65 in materials. Use a Kreg pocket hole jig for the joints and you’ll end up with something you’re genuinely proud to put in your living room.
5. A Small Storage Shed (Difficulty: 4/5)
Once you’ve completed two or three smaller projects, a small 8×6 shed is the natural next step. You’ll learn wall framing, how to lay out a floor, and how to work with larger sheet materials. Don’t attempt this as your first project — the skills from the earlier builds make the shed dramatically easier.
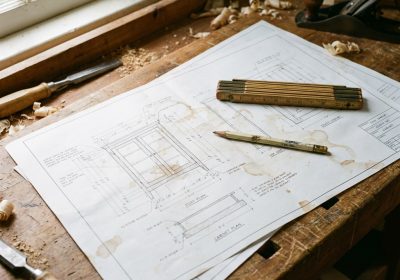
How to Read a Woodworking Plan
Woodworking plans look intimidating until you understand the four things every plan includes. Once you can read a plan, you can build anything — including projects far beyond what a tutorial video covers.
- Cut list — Every piece of wood you need, with exact dimensions listed as thickness × width × length. This is your shopping list and your first read. Add 10–15% to lumber quantities for waste and culls.
- Materials list — The screws, hardware, glue, and finish you’ll need. Read this before you go to the store — hardware store trips are expensive in time.
- Assembly diagrams — Exploded-view drawings showing how parts fit together. Read these before you cut a single board. Understanding how it goes together changes how you approach every step.
- Step-by-step instructions — Written in the order you should build. Don’t skip steps, even if they seem obvious. The order is there for a reason.
The single most common beginner mistake is starting to cut before reading the whole plan. Spend 10 minutes reading it end-to-end first. You’ll catch things — a dimension that requires a different cut sequence, a hardware item you’d otherwise forget — that would cost you a trip back to the hardware store.
One practical tip: after reading the plan, write the dimensions directly on each board with a pencil before you cut. Mark the waste side of the cut line with an X. Cut on the waste side of the line, not through it — a saw blade has width (called “kerf”) and that ⅛” matters on precise joints.
Choosing the Right Wood
The hardware store has dozens of wood species and grades. Here’s what beginners should actually use, and what to avoid.
Pine (Recommended for Beginners)
Cheap, widely available, and easy to cut and sand. Looks great stained or painted. The downside: it dents and scratches more easily than hardwoods. Use it for furniture that won’t take heavy daily abuse, for practice, and for learning. When you pick boards at the store, sight down the length of every board — reject anything with a bow, twist, or cup. Spend the extra few minutes selecting straight boards and your assembly will be dramatically easier.
Plywood (The Secret Weapon)
¾” plywood is incredibly strong, doesn’t warp the way solid wood does, and is perfect for shelving, cabinet carcasses, and workbenches. It’s not glamorous, but it’s cheap and reliable. Buy cabinet-grade (sanded one or both faces, marked A/C or B/B) for projects where the face will show. Construction-grade is fine for shed walls and workbench tops.
Cedar and Pressure-Treated Pine (Outdoor Projects)
For anything that lives outside — planters, shed walls, decking, garden furniture — use cedar or pressure-treated pine. Both resist moisture and rot. Cedar smells great, looks better, and is lighter; PT pine costs less. Never use untreated pine outside: it will rot within a few years.
Poplar and Maple (When You’re Ready to Step Up)
Once you’ve built a few projects with pine, poplar is the natural next step for furniture that will get daily use. It’s harder and denser than pine, takes paint beautifully, and costs only slightly more. Maple is the go-to for cutting boards and anything that touches food — it’s tight-grained, hard, and food-safe with mineral oil finish.
5 Mistakes Every Beginner Makes (And How to Avoid Them)
These aren’t general warnings — these are the specific, concrete errors that ruin first projects. Fix all five and your first build will look like it came from someone who’s been doing this for years.
- Only measuring once before cutting — Measure twice, mark once, cut once. That saying exists because a 30-second re-check before the cut is free; a ruined board costs $8 and a trip back to the store. Mark your cut line with a pencil, double-check the measurement, then cut. Make it a habit from your very first board.
- Skipping sandpaper grits — Going from 80 grit straight to 220 leaves deep scratches from the 80 visible under your finish. Those scratches are impossible to fix after staining. Work through every grit in sequence: 80 → 120 → 180 → 220. Each grit removes the scratches left by the previous one. Skip one and you skip all its work.
- Not checking for square during assembly — A speed square costs $8. Use it after every joint. An out-of-square corner at step 2 compounds through every step that follows — a table that rocks, a box that won’t close, a shelf that leans. Check diagonals on any rectangular assembly: measure corner to corner both ways. Equal diagonals mean square.
- Buying tools before you know what you need — The impulse is to equip fully before you start. Resist it. Buy the basics, build three projects, then buy whatever tool would have made those three projects easier. You’ll know exactly what you need after you’ve actually built something. Every tool you buy before that is a guess, and guesses often sit unused.
- Choosing too ambitious a first project — A dining table with hand-cut mortise-and-tenon joints is not a first project. It’s not even a fifth project. Start with something small where if you make a mistake, you haven’t wasted three weeks of work and $200 in materials. Build in the right order — small, simple, useful — and your third project will genuinely impress people.
Where to Get Plans — and How to Know If They’re Good
Free plans from Ana White, Instructables, and Family Handyman are excellent for straightforward projects. The limitation: free plans often have incomplete cut lists, missing hardware details, or diagrams that don’t match the instructions. For projects where those gaps matter — furniture, sheds, anything with precise joinery — a paid plan with a complete cut list, full materials list, and step-by-step instructions pays for itself in saved time and avoided mistakes.
When you’re ready to build seriously, Ted’s Woodworking gives you access to over 16,000 professionally drawn plans across every category — furniture, sheds, outdoor structures, décor, toys, and more. Every plan includes a full cut list, exact dimensions (actual sizes, not nominal), and step-by-step instructions. It’s the resource we recommend when you’ve finished your first two or three projects and want to start tackling real builds with confidence.