Platform beds sit lower to the ground than traditional bed frames — typically 250–300mm from the floor to the mattress support surface, compared to the standard 400–450mm for a box-spring-style frame. That lower profile changes the feel of a room. Ceilings look taller. The bedroom reads as more spacious and deliberately styled, not just furnished. If you are working with a smaller room or going for a modern minimalist aesthetic, a platform bed is one of the most effective single changes you can make. This guide covers how to build one for an Australian Queen mattress (1530×2030mm) and how to add under-bed storage that actually works.
Platform Bed vs Standard Frame: What Is Different
A standard bed frame holds a mattress high enough to need a base underneath — a box spring or a thick slatted base. A platform bed replaces both with a single rigid structure: a timber frame with either close-spaced slats or a ply panel as the mattress surface. This means:
- You save the cost of a separate base (typically $200–$600 for a Queen).
- The bed sits lower, which works with modern foam and hybrid mattresses that do not need a spring base.
- You can design under-bed storage directly into the build.
Check your mattress specifications before building. Most memory foam, latex and hybrid mattresses are designed for platform beds. Traditional innerspring mattresses often need a slatted base with closer-spaced slats (max 50mm gaps rather than 75mm) due to how the spring system distributes weight.
Cut List: Queen Platform Bed
| Part | Qty | Dimensions (mm) | Material | Notes |
|---|---|---|---|---|
| Long side rails | 2 | 2030 × 140 × 45 | DAR pine or LVL | Full length |
| End rails | 2 | 1530 × 140 × 45 | DAR pine or LVL | Fits between side rails |
| Centre support beam | 1 | 1440 × 140 × 45 | DAR pine or LVL | Midpoint, short dimension |
| Block legs (if used) | 4 | 100 × 100 × 150 | Hardwood or DAR pine | Corner legs |
| Centre leg | 1 | 100 × 100 × 150 | Hardwood or DAR pine | Under centre beam |
| Slat ledger strips | 2 | 2030 × 38 × 19 | Pine | Inside face of long rails |
| Platform slats | 14 | 1530 × 140 × 19 | Pine | Or substitute 12mm ply panel |
| Ply panel (alternative) | 1 | 2030 × 1530 × 12 | Structural ply | Solid base, better for foam mattresses |
Platform Base: Slats vs Solid Ply
You have two options for the mattress support surface, and the right choice depends on your mattress type.
Slatted base (140×19mm pine slats, max 75mm gaps): Better airflow, which matters for foam mattresses that retain heat. Cheaper and lighter. Any single slat can be replaced if it cracks. The slight flex in slats can also feel more comfortable for some sleepers. This is the most common platform bed construction and works well for the majority of foam, hybrid, and latex mattresses.
12mm structural ply panel: A completely rigid, uniform surface. Best for memory foam mattresses (particularly high-density foam over 80kg/m³) where the manufacturer specifies a solid base. Cut the ply 2–3mm narrower than the inner frame dimension on each side to allow for slight seasonal timber movement. Seal the top face with polyurethane to prevent moisture absorption into the ply. Do not use standard 9mm ply — it will flex and potentially crack under load across a 1530mm span without adequate support.
Leg Options and Heights
Option 1: Block Legs (150mm)
The simplest option. Cut 100×100mm hardwood or DAR pine to 150mm length. These attach directly to the underside corners of the frame using M10 bolt-in threaded inserts — a professional cabinet-making technique that allows the legs to be removed for moving. The block leg look is clean and modern; a slight chamfer on the bottom edges prevents splitting and adds a refined detail.
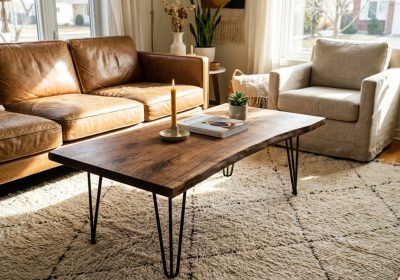
Option 2: Hairpin Legs
Hairpin legs are a popular choice for platform beds because their open metal structure does not visually interrupt the floating effect — you can see through them. Buy 150mm 3-rod hairpin legs from online suppliers (Etsy, Ebay AU, Yourlegs.com.au). They come with a flat mounting plate that screws directly to the underside of the frame. Use 30mm timber screws — not the supplied short screws, which are often inadequate. No centre leg option exists with hairpin legs, so you still need a solid centre beam; add a fifth hairpin leg under the beam at the midpoint.
Option 3: No Legs (Floor Platform)
The most minimal version: the frame sits directly on the floor or on thin 10–15mm rubber pads at each corner. This eliminates the floating gap under the bed but maximises the low-profile effect. It also means no under-bed storage. Use furniture felt pads under the frame corners to protect floorboards and prevent the frame from sliding.
Step-by-Step Build
Step 1: Cut All Pieces to Length
Use a drop saw for accuracy. Label every piece immediately after cutting — it is easy to confuse similarly sized rails at the bench.
Step 2: Fix Ledger Strips to Long Rails
Clamp and glue the 38×19mm ledger strips to the inside face of each long rail. Position so the top of the ledger is 19mm below the top of the rail. Fix with 40mm screws at 250mm centres. Pre-drill all holes.
Step 3: Assemble the Outer Frame
Stand both long rails upright with the ledger strips facing inward. Drop the end rails between them. Join using 120mm structural screws (two per corner) driven from the outside face of the long rail into the end grain of the end rail. Apply PVA glue to all mating faces. Check diagonal measurements for square before the glue sets.
Step 4: Fit the Centre Beam
Install the centre beam at the midpoint of the long rails using joist hangers. The top of the centre beam must be flush with the top of the ledger strips so all slats are level.
Step 5: Attach Legs
For block legs, drill a 10mm hole 30mm deep in the top of each leg and press in an M10 threaded insert. On the underside of the frame at each corner, drill a corresponding 10mm hole and drive in a bolt-in barrel nut. The leg bolts directly into the barrel nut. For centre leg on the beam, use the same method.
Step 6: Install Platform Base
If using slats, install them from one end with a 40mm spacer for consistent gaps. One screw per end per slat. If using ply, lower the full sheet into the frame and fix with 40mm screws through the ply into the ledgers and centre beam at 300mm intervals.
Step 7: Sand and Finish
Sand progressively through 80-, 120-, and 180-grit. A satin water-based polyurethane (Cabot’s Crystal Clear or Feast Watson) applied in two coats gives a durable, easy-to-clean finish that still shows the timber grain.
Adding Under-Bed Storage
Option A: Drawer Slides
With 150mm block legs, there is approximately 130mm of clearance under the frame — enough for flat storage drawers. Build simple open-top pine boxes (no bottom needed if you use a thin ply — 3mm will do). Install 55mm full-extension undermount drawer slides on the inside face of the outer frame. This is a more involved build but gives you organised, pull-out storage that keeps dust off your stored items.
Option B: Roll-Out Storage Boxes
The simpler approach: build shallow rectangular pine boxes with 50mm caster wheels on the base. These roll freely under the bed frame on floorboards or carpet (use locking casters on carpet). No drawer slides, no hardware other than the castors. Size them at 700mm long × 400mm wide × 100mm tall to fit easily under the 150mm leg clearance.
A platform bed build is one of the best beginner furniture projects you can take on. The structural requirements are straightforward, the material cost is low, and the result transforms any bedroom into something that looks considered and intentional.
Want More Furniture Plans?
If this platform bed has you thinking about the next build — wardrobe, bedside tables, a matching headboard — Ted’s Woodworking gives you access to over 16,000 detailed plans with cut lists, 3D diagrams and step-by-step instructions. It is the fastest way to go from idea to finished furniture.