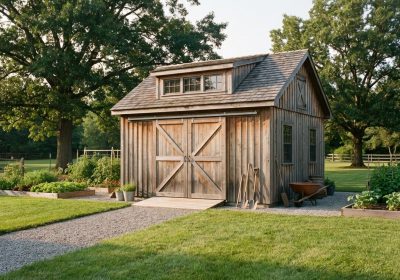
Not all pergolas are the same. A lean-to pergola against a brick fence is a completely different structure to a freestanding gable-roofed entertainment area — different engineering, different materials, different permit requirements, and a very different look in your garden. Choosing the right design before you build saves you from either over-engineering a simple project or under-building something that doesn’t hold up. This guide covers eight pergola designs commonly built in Australian backyards, from the simplest weekend job to more ambitious builds that need a full set of plans and possibly a building permit.
8 Pergola Designs at a Glance
| Design | Style | Size Range | Difficulty | Best For | Approx Cost (AU$, materials) |
|---|---|---|---|---|---|
| Lean-to (wall-attached) | Simple skillion — attaches to house or fence wall | 2×3m to 4×5m | Beginner | Extending indoor living, small courtyards | $800–$2,500 |
| Freestanding simple flat | Four posts, two beams, parallel rafters | 3×3m to 4×4m | Beginner–Intermediate | Middle of garden, pool areas, lawns | $1,200–$3,000 |
| Freestanding gable roof | Pitched roof with ridge beam, open or sheeted | 3×4m to 5×6m | Intermediate–Advanced | Large entertaining areas, want full rain cover | $3,500–$8,000 |
| Pool pergola | Open or shade-cloth covered, low profile | 3×3m to 4×6m | Beginner–Intermediate | Poolside shade, lounge zone | $1,500–$4,000 |
| Deck pergola | Posts built into or alongside deck structure | Deck-dependent | Intermediate | Elevated decks, outdoor dining above ground | $2,000–$6,000 |
| Arched top pergola | Curved or arched rafters over straight beams | 1.2×2m to 3×4m | Intermediate | Garden features, pathway covers, rose arches | $600–$3,500 |
| Privacy screen pergola | Vertical batten or lattice panels on one or more sides | 2×3m to 4×4m | Beginner–Intermediate | Screening from neighbours, fence replacement | $1,000–$3,000 |
| Shade sail hybrid | Timber or steel posts, tensioned shade sail overhead | 3×3m to 6×6m | Beginner | Maximum shade, modern aesthetic, easy to vary | $500–$2,000 |
Design 1: Lean-To Pergola (Wall-Attached)
The lean-to pergola is the most common first pergola project in Australia. One end of the rafters attaches to the house wall (or a brick fence), the other end rests on a beam supported by two posts. It creates a covered transition zone between the house and garden.
What makes it distinctive: The ledger board — a horizontal timber bolted directly into the house wall — is the key structural element. Every rafter hangs off it at one end. The ledger must be through-bolted into masonry or structural framing, not just screwed into cladding.
Key challenge: Waterproofing the wall junction. If the flashing between the ledger and the wall is not correctly done, you will get water intrusion into the wall cavity within a couple of years. Use proprietary aluminium flashing bent to suit the wall profile and seal the top edge with appropriate exterior sealant.
Recommended materials: 90×45mm rafters at 600–900mm centres, 190×45mm ledger board, 100×100mm H4 posts set 600mm in concrete. Polycarbonate or Colorbond roofing if weather protection is required.
Design 2: Freestanding Simple Flat Pergola
Four posts, two parallel beams running front-to-back, and a series of rafters running side-to-side across the beams. No wall attachment required. This is the most beginner-friendly freestanding structure and the basis for most of the other designs on this list.
What makes it distinctive: Complete independence from the house structure. You can place it anywhere in your yard. The rafter ends can be left square or given a decorative profile (a simple arc or angled cut) that adds significant visual interest with minimal extra work.
Key challenge: Getting all four posts perfectly level and square before the concrete sets. See the freestanding pergola build guide for the step-by-step levelling process.
Recommended materials: 100×100mm H4 posts, 190×45mm beams, 140×45mm rafters at 600mm centres, shade cloth or bare rafters for the top.
Design 3: Freestanding Gable Roof Pergola
A gable roof pergola has a ridge beam running along the peak, with rafters pitching down to both sides. It looks like a house roof — and structurally it is similar. This design is substantially more complex than a flat pergola because the ridge and rafter connections must handle significant load and the roof structure must be properly engineered.
What makes it distinctive: The classic pitched-roof shape makes it look like a permanent structure rather than a temporary shade cover. When sheeted with Colorbond or polycarbonate and trimmed with fascias, a gable pergola is indistinguishable from a proper outdoor room.
Key challenge: The structural framing around the ridge and the rafter-to-beam connections. A collar tie (horizontal timber connecting opposing rafters partway up) is essential to resist the outward thrust at the beam. If in doubt, get a structural engineer to check the rafter size and spacing.
Recommended materials: 140×140mm posts for spans over 3m, 240×45mm ridge beam, 140×45mm rafters at 600mm centres (polycarbonate) or 900mm (Colorbond). Trimdek Colorbond is the most common finish.
Design 4: Pool Pergola
Pergolas built alongside a swimming pool have specific requirements beyond standard outdoor structures. They must handle the moisture-heavy environment, any structural timber must be at a minimum height above water per the relevant Australian standard (AS1926 pool barrier requirements), and the design must not obstruct pool visibility from the house (depending on your jurisdiction).
What makes it distinctive: Typically lower profile (2.1–2.4m height to keep sight lines to the pool), open or shade-cloth covered, often with a western or northern orientation to catch afternoon shade where it is needed most.
Key challenge: Chlorine exposure accelerates corrosion of metal fixings. Use hot-dipped galvanised or stainless steel hardware throughout — never bright zinc plated (BZP) hardware in a pool environment.
Recommended materials: H4 treated pine posts (or hardwood), galvanised post caps and joist hangers, 90% shade cloth or open rafters. Check pool barrier compliance with your local council before building.
Design 5: Deck Pergola
A deck pergola integrates structurally with an elevated timber deck. Posts may be extensions of the deck posts, or the pergola can sit independently alongside the deck frame. The elevated position means wind loads are higher than at ground level.
What makes it distinctive: The visual continuity between the deck and the overhead structure creates a genuinely integrated outdoor room. A well-designed deck pergola with string lights overhead is one of the most used outdoor spaces in an Australian home.
Key challenge: Cantilever connections and beam sizing for elevated decks. The pergola posts add significant point loads to the deck frame — these must be transferred to footings or posts that go to the ground. Do not attempt to support a pergola from deck joists alone without engineering confirmation.
Recommended materials: Match the decking timber in the pergola posts and beams for visual consistency. Merbau-to-merbau or spotted gum-to-spotted gum always looks better than mixing timber species between deck and pergola.
Design 6: Arched Top Pergola
Arched pergolas use curved or shaped rafters to create a rounded overhead profile. The arch can be a gentle curve on standard timber rafters (achieved by kerfing — making a series of shallow saw cuts along the underside of the timber to allow it to bend) or by laminating thin strips of timber over a curved former.
What makes it distinctive: The arch is an instant focal point in a garden. Covered with climbing roses or wisteria, an arched pergola over a pathway is one of the most beautiful garden structures you can build.
Key challenge: Getting consistent curves on all arched pieces. Making a curved timber former that all arches are bent and clamped over (laminating technique) produces the most consistent results. Kerfing is faster but less precise.
Recommended materials: Western red cedar (bends well, lightweight, naturally durable) or treated pine for the arch members. Standard square section for posts and beams. 70×19mm strips for laminated arches.
Design 7: Privacy Screen Pergola
A privacy screen pergola combines an overhead structure with vertical panels on one or more sides to block sightlines to neighbouring properties. The panels can be fixed vertical battens (timber or aluminium), lattice panels, or louvred screens.
What makes it distinctive: Solves two problems at once — shade and privacy. Very common in suburban backyards where fencing height limits (typically 1.8m) leave the yard overlooked from a neighbour’s raised ground or second storey.
Key challenge: Wind load on vertical panels is significant. The posts must be oversized and the footings deeper to resist the sail effect of the panels. As a rule of thumb, add 200mm to footing depth for every metre of panel height above the top of the post.
Recommended materials: 140×140mm posts for privacy panels, 70×19mm or 90×19mm vertical battens at 50–100mm spacing (adjust spacing for desired privacy vs airflow), aluminium or stainless fixing clips.
Design 8: Shade Sail Hybrid Pergola
This design uses timber or steel posts (typically 100×100mm square post or 65mm RHS steel) to tension a modern shade sail overhead. It achieves maximum shade coverage without the weight and complexity of a framed roof.
What makes it distinctive: Clean, modern look. Very quick to build (the posts are the project — the sail clips on after). Shade sails can be replaced inexpensively when they degrade (every 8–12 years). Post positions can be asymmetric, which is sometimes an advantage when working around existing features.
Key challenge: The tensioning forces on shade sail posts are very high — the sail wants to pull the top of each post inward. Posts must be raked outward slightly (angled away from the sail centre at approximately 10–15 degrees) and the footings must be deep enough to resist the resulting overturning moment. 750mm deep footings at 300mm diameter are the absolute minimum for shade sail posts.
Recommended materials: 100×100mm H4 timber posts or 65×65×3mm RHS steel posts (painted with primer and enamel), purpose-built sail shade with UV-rated polyethylene fabric, stainless steel D-shackles and turnbuckles for tensioning.
Choosing the Right Design for Your Yard
The right pergola design depends on three things: what you want to do under it, your budget, and your confidence with tools. If this is your first build, start with a lean-to or freestanding flat pergola. Master the basics — square layouts, plumb posts, beam connections — and the more complex designs become achievable in future builds.
If you want to go further than general descriptions and get into full measured plans for any of these designs — with proper engineering dimensions, hardware specifications, and step-by-step drawings — Ted’s Woodworking is the most complete resource available for DIY builders.