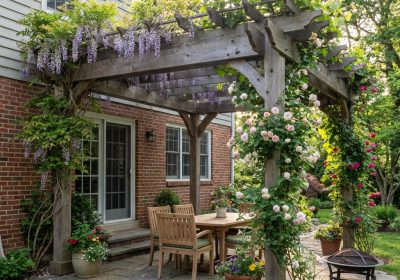
A freestanding pergola gives you shade, structure, and a defined outdoor room without attaching anything to your house. You can put it over a lawn, a patio, beside a pool, or in the middle of a garden — anywhere you want a covered space without a permanent roof. For a beginner, a freestanding pergola is a better first structure than an attached pergola because the most critical step (levelling four posts correctly) can be done without working around existing walls. Get that step right and everything else follows logically.
Choosing Your Size
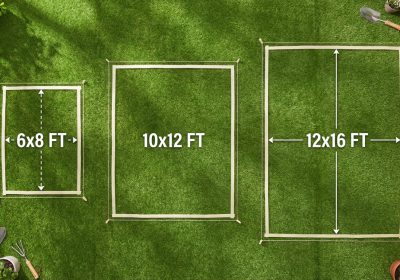
The most popular freestanding pergola sizes for Australian backyards are 3×3m and 3×4m. These sizes work well for:
- An outdoor dining area (3×3m seats four; 3×4m seats six)
- A relaxation zone with lounges
- Poolside shade
- A covered work area in the garden
For a first build, a 3×3m pergola is manageable solo or with one helper. The 3×4m version requires two people for the beam installation. Both use the same techniques — the 3×4m just has longer beams and an extra rafter.
Materials and Post Sizing
Posts are the most important structural decision. For a 3×3m or 3×4m freestanding pergola:
- 90×90mm H4 treated pine posts — the minimum practical size. Suitable for a 2.4m–2.7m pergola height. H4 rating is mandatory for in-ground contact.
- 100×100mm H4 treated pine posts — a slightly more robust option, very common in AU hardware stores (often sold as 100×100mm but true dimension is 90×90mm dressed). Use this size if your spans are at the wider end or if you intend to add a roof later.
- 140×140mm posts — for pergolas over 3.6m tall or spans over 4m. Overkill for a standard backyard pergola but the right choice for a larger entertainment area.
Cut List — 3×3m Freestanding Pergola
| Part | Qty | Timber Size | Cut Length | Notes |
|---|---|---|---|---|
| Posts | 4 | 100×100mm H4 treated pine | 3300mm | Allows 600mm in-ground + 2700mm above grade |
| Beams (span across posts) | 2 | 190×45mm treated pine | 3200mm | Sit on top of posts, run parallel on 3m sides |
| Rafters | 5 | 140×45mm treated pine | 3200mm | Span across beams at 600mm centres; add 100mm overhang each end |
| Purlins (optional) | 4–5 | 90×45mm treated pine | 3000mm | Run at 90° to rafters if adding shade cloth or lattice |
| Post stirrups (alt. to in-ground) | 4 | Steel post stirrup | — | Optional: set in concrete pad instead of timber in ground |
Hardware: 4× coach bolts 12×150mm (beam-to-post connection), 75mm and 100mm galvanised framing nails or joist hanger screws, post stirrups or in-ground post bases, concrete (1 bag per post hole), post caps if using stirrups.
Post Footings: Getting This Right
In most Australian residential soil types, the standard footing specification for a freestanding pergola post is:
- Diameter: 300mm
- Depth: 600mm minimum (sandy soil: 750mm; expansive clay soils: 900mm)
- Concrete mix: one 20kg bag of Rapid Set or similar quick-set concrete per hole
If your soil is particularly sandy or you are in a high-wind area (coastal Queensland, WA coastal), increase depth to 750–900mm and use a 300mm diameter tube form (cardboard concrete tube, available at Bunnings for around $12 each).
For a paved or tiled area where you cannot dig, use surface-mounted post stirrups (Posi-Strut or similar) bolted into a poured concrete pad. The pad must be at least 450×450×200mm with two 12mm reo bars to anchor the stirrup bolt group. This is a legitimate structural alternative to in-ground posts and is especially clean-looking on a tiled patio.
Beam Connection: Notching vs Post Caps
There are two standard ways to connect the beams to the tops of the posts:
Option 1: Notching the Post
Cut a notch (housing joint) in the top of each post to accept the beam. The notch depth equals the height of the beam (190mm in our case) and the notch width equals the beam thickness (45mm). The beam sits in the notch, is flush with the top of the post, and is bolted through with a 12mm coach bolt. This is a strong, traditional connection and looks excellent when finished. It requires precise marking and cutting with a chisel or router.
Option 2: Post Cap Hardware
Galvanised steel post caps (available at Bunnings, approx $15–$25 each) bolt to the top of the post and cradle the beam. The beam is nailed or screwed into the cap’s side flanges. This is faster, does not require notching, and produces a connection that is structurally equivalent or superior to a notched joint when the hardware is correctly specified. For a first pergola, post caps are the recommended approach — they are more forgiving of minor post height variations and are easy to adjust during installation.
The Critical Step: Levelling All Four Posts
This is the step that determines whether your finished pergola looks professional or wonky. Every other measurement depends on getting all four post tops at exactly the same height. Here is the method that works:
- Set out the post hole positions using batter boards and string lines. Measure diagonals to confirm the four holes are square — both diagonals must be equal. This is non-negotiable.
- Dig all four holes to the required depth. Check each one is plumb and the right diameter.
- Cut all four posts to the same length — if using in-ground posts, all four posts should be the same cut length (3300mm in our cut list).
- Set the first post: stand it in the hole, use a post level (a two-way level that clips to the post) to plumb it in both directions, then temporarily brace it with two diagonal stakes and string. Pour the concrete and wait for initial set (approximately 20 minutes for rapid-set concrete).
- Use a water level or laser level to transfer the exact height of the first post top to all remaining posts. Mark each one with a pencil line at the reference height. This accounts for variations in ground level — it is more accurate than measuring from the ground up because the ground is never perfectly level.
- Set the remaining three posts to the same reference height, plumbing each one before the concrete sets. Check all four again before the concrete fully cures.
A builder’s laser level makes this step fast and accurate. Hire one from Kennards or Total Tools for around $60/day if you don’t own one — it is worth every dollar.
Rafter Installation and Finishing Options
Once both beams are in place and bolted to the posts, rafter installation is straightforward. Cut all rafters to the same length. Mark out the 600mm rafter spacing on both beams. Use joist hanger hardware at each end or toenail at a 45-degree angle with 100mm nails. Check each rafter is square to the beams as you go.
Shade Cloth Finish
Shade cloth is the most popular finishing option for Australian freestanding pergolas. Use 90% block-out shade cloth for full shade (poolside, hot-facing aspect) or 50–70% for filtered light (garden, morning sun area). Tension it across the rafters and fix with UV-rated shade cloth clips. Replace every 8–10 years as UV degrades the fabric.
Bare Rafters
Leaving the rafters open (no covering) provides a structure for climbing plants (wisteria, passionfruit, star jasmine) and creates dappled shade within two to three years. It is also the simplest finish and requires no additional investment.
Want Complete Plans With Footing Schedules?
A written guide gives you the principles, but a complete set of measured plans — with exact footing specifications for your soil type, full dimensioned drawings, and hardware schedules — is what makes a build like this genuinely approachable. Ted’s Woodworking has detailed pergola plans for freestanding structures in multiple sizes, all with full documentation.
Get Complete Freestanding Pergola Plans at Ted’s Woodworking — 16,000+ Projects With Full Drawings