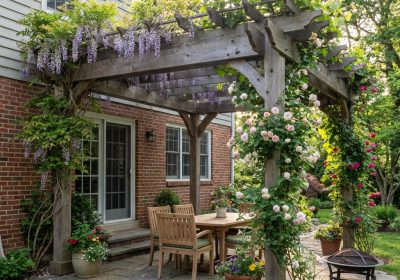
An open pergola gives you shade from overhead beams and looks great in a garden, but it does nothing when it rains. Adding a solid or translucent roof to a pergola transforms it into a proper outdoor room — somewhere you can sit during a summer downpour, entertain year-round, and actually use rather than just look at. This guide covers the three main roofing options available in Australia, how to frame for each, and the planning permit requirements you need to know about before you pick up a saw.
Open Pergola vs Roofed Pergola: What Changes
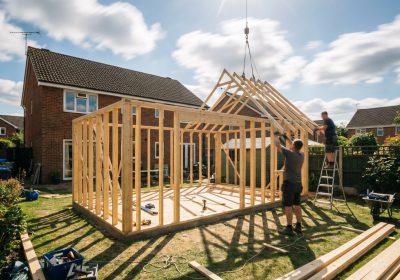
An open pergola — parallel rafters with no covering — is structurally the simplest outdoor structure. Wind passes through it, rain falls through it, and it acts as a shade structure when the sun is low. A roofed pergola is a fundamentally different structure. The roof adds dead load (the weight of the sheeting), wind uplift load, and water runoff that has to go somewhere. These forces are transferred into your posts and footings, which means they need to be correctly sized and anchored. This is not something to wing — if you are unsure about structural loads, engage a builder or structural engineer for the post and footing sizing.
Roof Options for Pergolas in Australia
Option 1: Polycarbonate Twin-Wall Sheeting (Translucent)
Polycarbonate twin-wall sheeting is the most popular roofing choice for DIY pergolas in Australia. Available at Bunnings and all hardware stores in clear, opal (white), or tinted variants. It lets natural light through while blocking rain and UV (most good polycarbonate is rated to block 99% of UV). The 6mm twin-wall panels are the standard residential choice — lightweight, easy to cut with a circular saw (fine-toothed blade), and available in standard widths of 600mm or full sheets of 1200mm wide.
Key framing requirement for polycarbonate: Rafters must be at 600mm centres maximum. Many older pergola rafter layouts use 900mm or even 1200mm spacing — this is not adequate for polycarbonate, which will sag between supports. When adding a polycarbonate roof to an existing pergola, you will almost certainly need to add intermediate rafters.
Polycarbonate must also run in the direction of the roof pitch (vertical channels down the slope) so condensation drains out the bottom rather than pooling inside the cells. Seal the top cut edge with aluminium foil tape and fit a vented cap strip. Leave the bottom open with a vented U-channel so moisture can drain. Sheets are fixed with roofing screws through pre-drilled clearance holes (oversize the hole 3mm to allow for thermal expansion — polycarbonate moves significantly in Australian heat).
Option 2: Colorbond Steel Roofing
Colorbond steel gives you a solid, opaque roof with a clean, modern look. It is the same material used on most Australian homes. Advantages: very long-lasting (25+ years), available in all standard Colorbond colours to match your house, sheds rain effectively, and handles Australian UV without degrading. Disadvantages: blocks all natural light, can be noisy in heavy rain, and is heavier than polycarbonate (adds more dead load to the structure).
For a DIY pergola, Trimdek or Klip-Lok profiles are the most common choices. Trimdek is screw-fixed and easier to work with for a beginner. Minimum roof pitch for Colorbond is 5 degrees (some profiles are rated to 1.5 degrees but that is not ideal for a pergola). Standard rafter centres for Colorbond steel: 900mm maximum for most residential profiles at typical spans.
Colorbond is cut with a metal-cutting circular saw blade or tin snips for short cuts. Wear gloves — the cut edges are extremely sharp. Rivet or screw the sheets at every second corrugation at the ends and every third in the field.
Option 3: Shade Cloth
Shade cloth is not a weatherproof roof — it is worth stating clearly. Woven shade cloth allows air movement and blocks a percentage of UV and direct sunlight (50%, 70%, or 90% shade ratings), but it does not keep rain out. However, it is widely used for pergolas in Australia because it reduces temperature under the structure significantly, is inexpensive, and is very easy to install. For areas where you want filtered light and cooling rather than full rain protection, it is a legitimate option.
Shade cloth is tensioned over the rafter system and fixed with shade cloth clips or by lacing through eyelets with rope. Rafters can be at wider spacing (up to 1500mm) since the cloth has no structural requirements beyond staying taut.
Framing Comparison
| Roof Type | Rafter Spacing | Minimum Pitch | Rafter Size (3m span) | Fixing Method | Bunnings Available? |
|---|---|---|---|---|---|
| Polycarbonate twin-wall | 600mm max | 5° (100mm per metre) | 90×45mm at 600mm centres | Roofing screws, aluminium flashing at wall | Yes — sheeting and fixings |
| Colorbond Trimdek steel | 900mm max | 5° | 90×45mm at 900mm centres | Self-drilling roofing screws through crest | Sheeting from roofing suppliers |
| Shade cloth | Up to 1500mm | None required | 90×45mm standard | Shade cloth clips, tensioning rope | Yes — all materials |
Adding a Roof to an Existing Pergola
If you are adding a roof to an existing open pergola, work through this checklist before starting:
- Check post sizes — a roofed pergola needs larger footings and posts than an open structure. 90×90mm posts may be adequate for a small 3×3m pergola; 140×140mm or 140×90mm are more appropriate for spans over 3m.
- Check rafter spacing — measure your existing rafter spacing and compare to the requirements above. Add intermediate rafters if needed before ordering sheeting.
- Install a fascia board — a fascia at the front and sides contains the sheeting edge neatly and provides a surface for flashing.
- Create a gutter — a roofed pergola creates concentrated water runoff. Plan where it goes before the roof goes on. A simple box gutter on the low side, draining to a garden bed or stormwater, is usually the right solution.
- Flash against the wall — if the pergola abuts the house, the junction between the new roof and the house wall must be properly flashed with aluminium or lead flashing to prevent water entry. This is critical — it is where most DIY pergola roofs eventually leak.
Planning Permits in Australia: What You Need to Know
This is where many DIY builders are caught out. An open pergola attached to a house is usually exempt from a Development Application in most Australian states under Complying Development (CDC) rules, provided it meets specific size limits. A roofed pergola is treated differently — it is classified as a covered structure and triggers different requirements.
| State | Typical Exempt Threshold (roofed structure) | Key Requirements for Exemption | Notes |
|---|---|---|---|
| Queensland | Up to 10m² exempt under some codes; most roofed pergolas require a building permit | Max 2.4m wall height, setback requirements, under 10m² | Contact your local council — rules vary by LGA. Above 10m² almost always needs a permit. |
| NSW | Under 20m² may qualify as Complying Development; check CDC pathway | Not heritage-listed, residential zone, setbacks met | Use the NSW Planning Portal to check CDC eligibility before starting. |
| Victoria | Under 18m², max height 3m, setbacks met | Must be in RGZ, NRZ or GRZ, no heritage overlay | Check your property’s Planning Certificate for overlays — heritage and bushfire overlays trigger additional requirements. |
| Western Australia | Ancillary structures up to 60m² may be R-Code exempt | Height and setback compliance required | Check R-Codes and local planning scheme; WA is generally more permissive |
The safe approach: call your local council before you start. Describe what you intend to build (dimensions, attached or freestanding, roof material). Ask specifically whether a building permit is required. Getting caught with an unapproved covered structure can result in orders to demolish it, which is a painful and expensive outcome. The phone call takes ten minutes.
Want Full Pergola Plans With Framing Drawings?
Understanding the principles is the first step — having detailed drawings that show you exactly where every bolt goes, how to frame the wall junction, and how to size your posts for your specific span makes the build significantly easier and safer. Ted’s Woodworking includes multiple pergola and outdoor structure plans, with full measured drawings.
Get Full Pergola Plans at Ted’s Woodworking — Structural Drawings, Cut Lists, and 16,000+ Projects