A leaning ladder shelf might be the most accessible furniture project you can build. There’s no complicated joinery, no mortises, no pocket holes if you don’t want them — just two long rails, five shelf boards, and some basic finishing. In two hours of actual build time (not counting drying), you have a functional, good-looking shelf that can display books, plants, folded towels, or anything else that needs a home. This guide covers everything from the cut list through to wall safety and finishing options.
How a Ladder Shelf Works
Traditional leaning ladder shelves rest at an angle against the wall — typically 15–20 degrees from vertical. The weight of the shelf and whatever is on it pushes down and back into the wall, which is what keeps it stable. This is a simple, elegant solution that requires no wall fixings if you’re cautious about weight loading — but for safety, especially in homes with children, a single top anchor point into a wall stud is strongly recommended.
The two long pieces (the “rails” or “stiles”) run the full height and carry the five shelves between them. The shelves are notched, screwed, or dadoed into the rails — this build uses screws and glue for simplicity.
Cut List
| Part | Material | Length | Width | Thickness | Qty |
|---|---|---|---|---|---|
| Side rails | 42 × 19 mm pine DAR | 1800 mm | 42 mm | 19 mm | 2 |
| Shelf boards | 140 × 19 mm pine DAR | 600 mm | 140 mm | 19 mm | 5 |
Assembled dimensions: Approximately 600 mm wide × 1800 mm tall. Shelf spacing from the bottom: 300 mm, 600 mm, 900 mm, 1200 mm, 1500 mm. This gives approximately 280 mm of usable vertical space between each shelf, which fits standard paperback and hardback books comfortably.
Adjusting for your space: Reduce rail length to 1500 mm for a bathroom or bedroom version. Increase shelf width to 800 mm for a hallway unit — just scale the shelf boards accordingly.
Tools Required
- Mitre saw or hand saw
- Drill/driver
- Spirit level
- Tape measure and pencil
- Clamps (optional but helpful)
- Sandpaper (120, 180, 220 grit)
Step-by-Step Assembly
- Cut all components. Cut both rails to 1800 mm. Cut all five shelf boards to 600 mm. Check that the ends are square — a slight out-of-square cut on the shelf boards will cause the finished shelf to rack sideways when stood up.
- Mark shelf positions on the rails. Lay both rails flat on your work surface, side by side, with the faces up. Mark the shelf positions at 300, 600, 900, 1200, and 1500 mm from the bottom of each rail. Make the marks on both rails simultaneously to ensure they’re identical.
- Pre-drill pilot holes. At each shelf position mark, drill two pilot holes through the outside face of each rail at 45 mm in from the edge (so the screws hit the centre of the 140 mm shelf board, 70 mm from each side of the shelf). Use a drill bit slightly smaller than your screw diameter — 2.5 mm for #8 screws.
- Attach the bottom shelf first. Apply a small bead of PVA glue to each end of the bottom shelf board. Position the shelf at the 300 mm mark on both rails, check it’s square with a try-square, and drive two 50 mm countersunk screws through each rail into the shelf end. Wipe glue squeeze-out immediately.
- Attach remaining shelves. Work your way up, attaching each shelf at its marked position. Check the assembly for square after each shelf — measure the diagonals and tap the structure to correct before the glue sets. The shelf boards keep the rails parallel, so accuracy here determines whether the finished unit stands without twisting.
- Sand the assembly. With all five shelves in place, sand the entire piece. Start at 120 grit to remove pencil marks and any glue spots. Progress to 180, then 220. Round over any sharp edges with the 220 grit — this is a safety step and improves the look.
- Apply finish. See the finishing section below.
- Add rubber feet and wall anchor. See the safety section below.
Preventing the Shelf from Slipping — Wall Safety
A ladder shelf leans at a forward angle. The bottom feet press into the floor and the top rail presses into the wall. Two failure modes exist: the bottom feet slide out on a smooth floor, and the top tips away from the wall if overloaded or pushed.
Rubber feet: Attach self-adhesive rubber pads or rubber furniture feet to the bottom cut ends of both rails. These provide friction on tiles, floorboards, and most floor surfaces. On carpet, the shelf grips naturally — no feet needed.
Top wall anchor: For any home with children (or for general safety), drill a small angle bracket or picture-hanging D-ring into the back of the top rail, and fix a picture-hanging screw or small hook into the wall stud directly behind it. This prevents the shelf from tipping forward. Use a stud finder to locate the stud — do not anchor into plasterboard alone. A single screw into a stud holds hundreds of kilograms; a screw into plasterboard alone will pull out under minimal load.
Finishing Options: Paint vs Stain
Paint: A painted ladder shelf is contemporary and clean. Two coats of water-based interior paint (Dulux or Haymes at Bunnings) in white, sage green, or navy all look excellent. Lightly sand at 180 before the first coat, and again at 320 between coats. A painted finish hides pine’s less attractive grain and gives you maximum colour flexibility.
Stain: If your pine has good grain and you want a natural wood look, a medium walnut or light oak stain gives a Scandinavian aesthetic. Apply the stain, let it dry, then seal with two coats of matte water-based polyurethane for a durable surface.
Raw wood + oil: For a very natural look, skip the stain and apply danish oil directly. This brings out the grain with a warm amber tone and requires no painting skills. It’s also the easiest finish to repair — just wipe a new coat into any scratches.
Variations to Extend the Design
Add a Back Panel
Cut a sheet of 3 mm or 6 mm plywood or hardboard to 600 × 1800 mm and nail or glue it to the back of the assembled frame before leaning it against the wall. This stiffens the shelf considerably (almost eliminating racking) and gives you a backdrop for styling. A back panel also means the shelf can stand free of the wall if needed.
Add Hooks
Install coat hooks or S-hooks on the side rails or the bottom shelf for bags, scarves, or a dog lead. This converts the ladder shelf into a functional entry hall piece.
Make It Freestanding with a Third Rail
Add a third rail at the centre of each shelf, running parallel to the outer rails. This turns the ladder shelf into a proper bookcase that doesn’t need the wall for support. You’ll also need to add a foot rail at the base connecting the two outer rails to prevent them splaying outward.
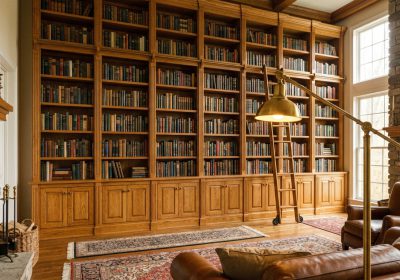
Take Your Shelf Builds Further
The ladder shelf is a confidence-building first project — it teaches you layout, square assembly, and finishing without any intimidating joinery. Once you’ve done this, you’re ready for shelving with dados, adjustable pin shelves, and built-in cabinetry. Ted’s Woodworking includes complete plans for dozens of shelving designs — from this beginner level right through to floor-to-ceiling library units with rolling ladders. Every plan includes a cut list, assembly diagrams, and step-by-step instructions.