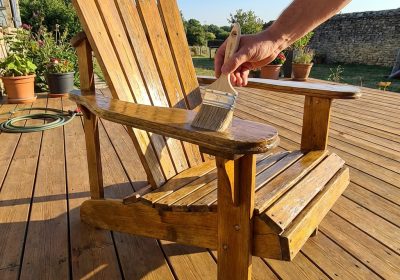
Pine is cheap, widely available, and easy to work with — which makes it a go-to timber for beginner woodworkers. But stain it without preparation and you’ll end up with a blotchy, uneven mess that no amount of extra coats will fix. The problem isn’t your technique or your stain brand. It’s the way pine is structured. This guide explains exactly why pine blotches and gives you three proven methods to get an even, professional-looking result every single time.
Why Pine Blotches: The Science in Plain English
Pine has two distinct types of grain that alternate through the board: earlywood (the light-coloured, soft bands) and latewood (the darker, denser bands). These two types of wood are structurally different. Earlywood is soft and porous — it soaks up stain like a sponge. Latewood is hard and dense — it resists stain absorption. When you brush stain onto a pine board, the earlywood turns dark quickly while the latewood stays light. The result is patchy, uneven, and frankly ugly.
This is not a flaw you can sand away or fix with a second coat of stain. Once the earlywood is saturated, adding more stain makes the overall board darker but doesn’t even out the variation — in fact, it often makes it worse. The only solution is to address the problem before you apply any stain at all.
You have three methods to choose from. Each has different results, costs, and skill requirements.
Comparison of Methods
| Method | Difficulty | Result Quality | Cost (approx. AU$) | Products Available in Australia |
|---|---|---|---|---|
| Pre-stain wood conditioner | Easy | Good — reduces blotching significantly but not perfectly | $15–$25 per litre | Feast Watson Pre-Stain Conditioner, Cabot’s Wood Conditioner (Bunnings) |
| Gel stain | Very easy | Very good — sits on surface, hides grain variation | $25–$40 per litre | Feast Watson Gel Stain, Cabot’s Gel Stain (Bunnings, Mitre 10) |
| Paint instead of stain | Easy | Excellent — eliminates the problem completely | $20–$45 per litre | Any interior/exterior water-based paint — Dulux, Haymes, Taubmans |
Method 1: Pre-Stain Wood Conditioner
Pre-stain conditioner is a thin, oil-based liquid that you apply to the wood before staining. It partially fills the pores of the earlywood, slowing down how quickly it absorbs the stain. This reduces (but doesn’t completely eliminate) blotching and gives a more even colour result.
Sanding Before You Start
Correct sanding is critical when using a conditioner. Use this sequence:
- Start at 100 grit to remove any mill marks, surface scratches, or rough areas
- Move to 150 grit to refine the surface
- Finish at 180 grit — stop here
Do not go finer than 180 grit when you plan to stain. Grits above 180 (220, 320, etc.) burnish and close the wood’s pores. A burnished surface resists stain absorption, which results in uneven, patchy colour — the very problem you’re trying to solve. This is a common beginner mistake: you think finer is better, but for staining, it works against you.
Applying the Conditioner
- After sanding and wiping off all dust, brush or wipe the conditioner onto the pine surface generously, going with the grain
- Let it penetrate for 5–15 minutes (check your specific product label — Feast Watson is 5 minutes, some others go up to 15)
- Wipe off any excess with a clean, lint-free rag
- Apply your chosen stain within 2 hours — if you wait longer, the conditioner dries and loses its effectiveness
Applying Stain Over Conditioner
Use a lint-free rag (better than a brush for pine) to apply the stain in long strokes along the grain. Work in manageable sections. Wipe off the excess within 3–5 minutes of application — don’t let it sit. The conditioner slows penetration, so the gap between applying and wiping off is less critical than with unconditioned timber, but you still need to wipe.
Honest expectation: Conditioner improves the result significantly on most pines but won’t give you perfectly even colour on every board. The result depends on the specific timber — tight-grained, kiln-dried pine responds much better than green, loose-grained timber. If you want a guaranteed even result, Method 2 is more reliable.
Method 2: Gel Stain — The Most Forgiving Option
Gel stain is a thicker, higher-viscosity stain that sits on the surface of the wood rather than penetrating deeply into the grain. Because it doesn’t soak into the earlywood the way liquid stain does, the variation between earlywood and latewood has much less impact on the final colour.
Gel stain is arguably the best method for beginners working with pine because the application process is forgiving, the results are predictable, and you don’t need to time anything precisely.
How to Apply Gel Stain
- Sand to 180 grit as described above. Clean off all dust.
- Open the gel stain and stir it — don’t shake. It will be noticeably thicker than regular liquid stain.
- Apply the gel stain with a clean rag or foam brush using a circular motion, working it into the grain. You’re essentially “painting” the colour onto the surface.
- After working it in, wipe off the excess with a clean rag, going with the grain. This removes any streaks from the circular application.
- Let it dry fully before applying a topcoat — check the label, but most gel stains need 8–10 hours at room temperature.
Gel stain also works well on vertical surfaces (cabinet doors, chair legs) because it doesn’t run. It’s also a good option if you’re trying to make pine look like a darker, more expensive hardwood — the colour sits more on the surface and reads differently than a penetrating stain.
Method 3: Paint Instead of Stain
Sometimes the right answer to “how do I avoid blotchy pine?” is: stop trying to stain pine and paint it instead. Paint is opaque, which means the variation between earlywood and latewood becomes completely irrelevant. You get perfectly even, professional colour every time.
This is not a cop-out. A lot of high-end furniture is made from pine and painted. Shaker-style cabinetry, children’s furniture, built-in shelving — all routinely built from pine and painted, not stained.
How to Paint Pine for a Smooth Result
- Sand to 150 grit. For paint, you don’t need to be precise about stopping at 180 — finer sanding is fine here.
- Apply a primer first — this is essential with pine. Pine’s resin can bleed through paint and cause yellowing. Use a shellac-based primer (Zinsser BIN is widely available at Bunnings) or a stain-blocking water-based primer. This step is skipped by beginners and is responsible for most paint adhesion problems on pine.
- Sand the primed surface lightly with 220 grit. Wipe clean.
- Apply two coats of your chosen paint, sanding lightly between coats with 220 grit.
Which Method Should You Choose?
If you want to show the wood grain and get a natural timber look: use gel stain — it’s the most reliable method for beginners working with pine who want a stained finish. Use the conditioner method if you already have liquid stain on hand and want to use it up.
If you want bold, even colour and don’t mind covering the grain: paint it. You’ll spend less time worrying about blotching and get a result you can be proud of.
Avoid the trap of fighting with cheap liquid stain on unconditioned pine — you’ll waste stain, time, and probably sand the project back and start again.
Want plans for pine projects that are designed from the start with beginner-friendly finishing in mind? Ted’s Woodworking has thousands of plans for pine furniture, storage boxes, and home projects — with complete materials lists, dimensions, and finishing notes. Take a look and find your next build.