A good step stool is one of the most useful things you can build for a young child — and one of the most satisfying first projects for a beginner. This kids step stool is sized perfectly for toddlers and preschoolers, with a first step at 200mm high and a second step at 400mm. The whole build takes around two hours with basic tools, and the result is sturdy enough to last through multiple kids. Follow these plans carefully, pay attention to the safety notes, and you’ll have a heirloom-quality piece that beats anything from the shops.
What You’ll Need Before You Start
This project uses standard-sized timber you can pick up at Bunnings or any local hardware store. The design relies on pocket hole joinery, which creates incredibly strong right-angle connections without needing clamps for hours. If you don’t own a pocket hole jig yet, the Kreg R3 Mini Jig costs under $50 and is worth every cent for projects like this.
Tools Required
- Circular saw or mitre saw
- Pocket hole jig (Kreg R3 or similar)
- Drill/driver
- Random orbital sander (or sandpaper, 80 / 120 / 180 grit)
- Tape measure and square
- Pencil
- Router with roundover bit (optional but highly recommended)
Cut List and Dimensions
All dimensions below are finished sizes. Use 18mm structural plywood (F17 grade) or 19mm pine DAR (dressed all round) from your local supplier. The step boards take the most wear, so choose clear-grade timber with no loose knots for those pieces.
| Part | Qty | Length | Width | Thickness | Material |
|---|---|---|---|---|---|
| Step board — lower (Step 1) | 1 | 360mm | 200mm | 18mm | Pine DAR or ply |
| Step board — upper (Step 2) | 1 | 300mm | 200mm | 18mm | Pine DAR or ply |
| Side panel — left | 1 | 400mm | 360mm | 18mm | Pine DAR or ply |
| Side panel — right | 1 | 400mm | 360mm | 18mm | Pine DAR or ply |
| Kickboard — front lower | 1 | 360mm | 160mm | 18mm | Pine DAR or ply |
| Kickboard — riser upper | 1 | 300mm | 200mm | 18mm | Pine DAR or ply |
| Back brace | 1 | 360mm | 80mm | 18mm | Pine DAR or ply |
Understanding the Dimensions
The step heights — 200mm and 400mm — match a toddler’s natural gait when climbing. Standard kitchen benches are around 900mm high, so the second step puts a 3–4 year old at a comfortable working height. The side panels are cut with a stepped profile (see step 3 below) so the stool looks finished and won’t have any exposed raw edges at the front. The overall footprint is 360mm wide by 360mm deep, giving a stable base that won’t tip when a child steps on the front edge.
Step-by-Step Build Instructions
- Mark and cut all pieces. Use the cut list above. Cut the side panels to the rough rectangle first (400mm × 360mm), then mark the stepped profile on each. The profile drops from 400mm tall at the back, down to 200mm tall at the front, with a 160mm-deep lower step shelf and a 300mm-deep upper step shelf. Cut the profile with a jigsaw.
- Sand all faces before assembly. Work through 80, 120, then 180 grit on every face. It’s far easier to sand flat panels now than to reach into corners after assembly. Pay extra attention to the top faces of both step boards — these get the most contact.
- Round all edges and corners. This is mandatory, not optional. Use a router with a 6mm roundover bit on every exposed edge, or spend extra time with a sanding block. Sharp corners on a step stool used by toddlers are a serious injury risk. Round the front corners of both step boards generously.
- Drill pocket holes. Set your pocket hole jig for 18mm stock. Drill two pocket holes on each end of both step boards (bottom face). Drill two pocket holes along the bottom edge of each kickboard. Drill two pocket holes on each end of the back brace.
- Dry fit everything first. Lay the two side panels flat on your bench, inside faces up. Position the lower step board so its top face sits exactly 200mm from the ground. Position the upper step board so its top face sits exactly 400mm from the ground. Check that everything is square before any glue goes on.
- Apply glue and assemble. Apply a thin bead of PVA wood glue to each mating surface. Clamp the side panels vertically and drive 32mm pocket screws through the step boards into the side panels. Fix the kickboards in place the same way. Attach the back brace across the top rear, connecting both side panels. Wipe away any glue squeeze-out immediately with a damp cloth.
- Check for square. Measure diagonally corner to corner in both directions. If the measurements match, the stool is square. If not, apply light clamp pressure across the longer diagonal until they equalise, then let the glue cure for at least an hour.
- Final sand. Once the glue is fully cured (leave overnight to be safe), give the entire stool a final pass with 180-grit sandpaper. Pay attention to any squeeze-out and all the rounded edges.
- Paint or finish. See the finishing section below.
- Attach non-slip pads. Apply self-adhesive rubber non-slip pads to the bottom of all four corners (to protect floors and prevent the stool sliding), and stick grip tape or apply a non-slip paint additive to the top surface of both steps.
Safety Requirements — Do Not Skip These
A kids step stool carries a child at height, and a fall from even 400mm onto a hard floor can cause injury. These safety measures are not optional:
- All corners must be rounded. No sharp 90-degree corners anywhere on the piece, especially the front corners of the step boards and the top corners of the side panels.
- Non-slip surface on both steps. Self-adhesive grip tape (the kind used on skateboard decks) works perfectly. Alternatively, mix a non-slip additive (fine sand or commercial grip additive) into the top coat of paint.
- Rubber feet on the bottom. The stool must not slide when a child steps onto it. Stick large self-adhesive rubber bumpers to all four bottom corners.
- No loose knots in the step boards. A knot that falls out mid-use is both a structural and trip hazard. Inspect your timber before cutting.
- Test load before first use. Stand on the stool yourself before letting a child use it. If anything creaks or flexes, find the loose joint and re-fix it.
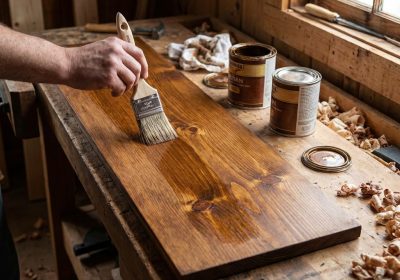
Choosing a Child-Safe Finish
Standard hardware-store paint is not always safe for items that children will touch, mouth, or chew. Look for paint that is labelled low VOC and carries the AP (Approved Product) certification from the Art and Creative Materials Institute — this means it has been independently tested and certified non-toxic. In Australia, Dulux Wash & Wear and Taubmans Endure are both low-VOC interior paints. For a completely clear finish, Livos or Osmo Polyx-Oil are natural, food-safe hardwax oils that are ideal for children’s furniture.
Apply two coats, sanding lightly with 220-grit between coats. Allow a full 24 hours of ventilation after the final coat before letting a child use the stool — even low-VOC paints off-gas most in the first day of drying.
Pocket Holes vs Biscuit Joinery
Pocket holes are faster and strong enough for this application — the screws are in shear rather than tension when a child stands on the step. Biscuit joinery is equally valid if you have a biscuit joiner; use two biscuits per joint and make sure you’re using proper woodworking PVA, not the watered-down craft variety. Either method, combined with glue, will produce a stool that outlasts the childhood of whoever uses it.
Ready to Build More?
This step stool is just the beginning. If you’ve caught the woodworking bug and want a library of proven, beginner-friendly plans for kids’ furniture, toys, and outdoor projects, Ted’s Woodworking has over 16,000 plans with full cut lists, step-by-step instructions, and detailed diagrams — everything you need to go from beginner to confident builder. It’s one of the best investments you can make if you’re serious about building things for your family.