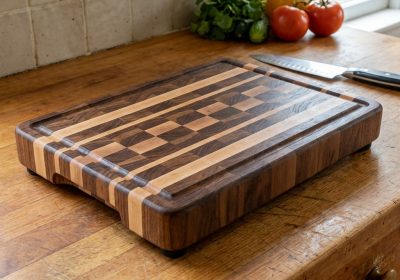
Geometric wood wall art is one of the most satisfying beginner woodworking projects because the precision of the angles does all the visual work for you. You don’t need carving skills or complex joinery — just accurate cuts and a clean finish. A hexagon mosaic or triangle chevron panel can transform a blank wall into a genuine feature, and the total materials cost is typically under $50. This guide covers both designs, how to cut reliable 60° and 30° angles without a specialist jig, and the finishing sequence that makes the difference between crisp geometric art and a blurry mess.
Choosing Your Design
Hexagon Mosaic
Each hexagon is made from six equilateral triangles — all cuts are at 60° (or the complementary 30°). The pieces tile together with tight joins to create a honeycomb pattern. You can mix stained and natural pieces, paint alternate cells, or use different timber species for contrast. A single hexagon mosaic panel sits well as a standalone piece or you can make multiple panels and hang them as a cluster.
Triangle Chevron Pattern
Alternating right-pointing and left-pointing triangles create the classic chevron (arrowhead) wave. The cuts are at 30°/60° and all pieces are the same size, making it highly repeatable once you have your mitre saw stop set. Chevron patterns work beautifully with alternating stain colours — dark walnut and natural pine, for example — or with a mix of painted and raw timber.
Setting Up Your Mitre Saw for Accurate Angles
The single most important step in geometric wall art is accurate angle cuts. A 1° error on a 60° cut will cause visible gaps when you tile the pieces together.
For Hexagon Pieces (60° cuts)
- Set your mitre saw to 30° (most saws label this as 30° from vertical, which gives you the 60° angle you need relative to the face of the workpiece).
- Cut a test piece and use a reliable protractor or digital angle gauge to verify the actual cut angle. Don’t rely solely on the saw’s scale markings — they drift over time.
- Set a stop block on the fence so every piece is cut to identical length. This is critical for tight-fitting hexagons.
- Cut all six pieces for one hexagon and dry-fit them on a flat surface. If all six pieces close into a perfect hexagon, your angle is correct. If there’s a gap, adjust the saw and retest.
For Chevron Pieces (30° cuts)
- Set your mitre saw to 60° from vertical (giving a 30° cut angle on the face).
- Cut pieces with the mitre alternating left and right to produce the opposing triangles for the chevron.
- Again, a stop block is essential for consistent piece lengths.
Materials
| Item | Specification | Notes |
|---|---|---|
| Timber strips | 19×19mm or 25×25mm DAR pine | DAR (Dressed All Round) = smooth, uniform. Also works with ripped-down larger boards for a flatter profile. |
| Backer panel | 6mm ply or MDF | Cut to final art piece dimensions. Provides the substrate to glue pieces onto. |
| Adhesive | Titebond Original or construction adhesive | Titebond for clean work; construction adhesive (Liquid Nails) for faster grab |
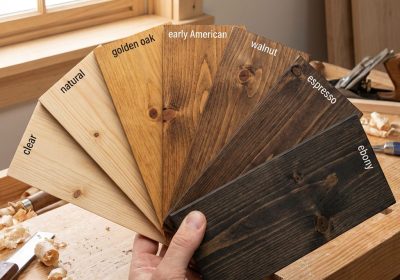
| Paint or stain | Your choice | Apply BEFORE assembly for cleanest colour separation |
| Hanging hardware | Sawtooth hangers or routed keyhole slots | Sawtooth is easiest; keyhole is cleaner |
Step-by-Step: Hexagon Mosaic Panel
- Determine your panel size. A 600×600mm backer panel is a good starting size — manageable to work on and substantial enough to make an impact on the wall. Mark out your hexagon grid lightly in pencil on the backer.
- Cut all timber pieces. Using your 30° mitre saw setting, cut all 19×19mm strips to the same length (80mm works well for a tiled hexagon pattern on a 600mm panel). Cut extras — you’ll lose some to tearout or slight errors.
- Finish all pieces before assembly. This is the key step most beginners skip. Paint or stain each piece individually before gluing. When pieces are painted/stained after assembly, paint bleeds across the joint lines and blurs the geometric separation. Pre-finishing gives you knife-sharp colour boundaries between pieces.
- Dry fit the entire layout on the backer before any glue touches anything. Adjust piece placement until you’re happy with the pattern. Take a photo to refer back to.
- Glue pieces to backer. Apply a thin bead of Titebond to the back face of each piece. Press firmly onto the backer. Tape across joints with painter’s tape while glue cures (1–2 hours). A caul (flat piece of ply) weighted on top ensures all pieces press down flat while curing.
- Clean up edges. Once cured, trim any overhanging pieces flush with the backer using a flush-trim bit or chisel.
Step-by-Step: Triangle Chevron Panel
- Plan alternating colours. Sketch the chevron pattern and mark which triangles will be dark and which natural/light. Classic is dark walnut stain alternating with natural or white-painted pine.
- Cut all pieces at 30° mitre, alternating left and right. For a 600×400mm panel using 19×19mm strips cut at 60mm, you’ll need approximately 80–100 pieces depending on the row arrangement.
- Stain or paint each batch before assembly (all dark pieces in one session, all light pieces in another).
- Lay out rows on the backer panel. Start at the bottom centre and work outward in both directions. The chevron pattern requires mirroring — left rows and right rows are cut as mirror images. Double-check the direction of each piece before gluing.
- Glue in rows, working bottom to top. Press down firmly and tape each row before adding the next.
Hanging Methods
Sawtooth Hangers (Easiest)
Hammer two sawtooth hangers into the top edge of the backer panel, spaced about 200mm apart. Drive a picture hook nail into the wall at each hanger position. Level across the two nails with a spirit level before hammering them fully in. This method takes two minutes and is completely adequate for panels up to about 5kg.
Keyhole Routing (Cleanest)
A keyhole router bit cuts a slot in the back of the backer panel. You hang the panel on a screw head protruding from the wall — the panel slides down over the screw head and locks in. No visible hardware on the front or edges. Use two keyhole slots for a panel this size, spaced at least 200mm apart. This method requires a router and keyhole bit but produces a professional finish.
Finishing Touches
- Seal the entire assembled panel with a coat of matte varnish or clear wax to unify the surface and protect the stain from handling
- If using paint, touch up any brush marks on the backer that are visible between pieces
- Wipe the face with a tack cloth before applying any sealer coat — dust settles in the crevices between pieces
Geometric wall art is an excellent project for practising accurate mitre cuts — a skill that directly transfers to picture frames, box lids, and decorative inlay work. Make one panel and you’ll want to make a series. For plans covering more advanced geometric designs including diamond patterns, sunburst panels, and herringbone frames, Ted’s Woodworking has an extensive decorative woodworking section worth exploring.