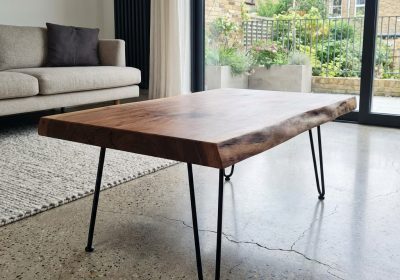
Building a round dining table is one of those projects that looks harder than it actually is — until you hit the circle-cutting step. That’s where most beginners get stuck. A jigsaw freehand won’t give you a true circle, and you can’t run a round panel through a table saw. This guide covers two reliable methods for cutting a perfect circle, a complete cut list for a four-person round table, and everything you need to know about attaching legs to a curved top.
Choosing Your Circle-Cutting Method
You have two practical options for cutting a circle from a panel: a router trammel jig or a jigsaw with a template. Each has its place depending on the tools you have and the finish quality you need.
Method 1: Router Trammel Jig (Recommended)
A trammel is simply a long arm that holds your router at a fixed distance from a pivot point. You can make one in 15 minutes from a piece of 12mm ply offcut.
- Cut a strip of ply about 600mm long and 60mm wide.
- Drill a small hole at one end to fit over a nail or screw — this is your pivot point.
- At the other end, bolt your router baseplate to the strip, or drill a hole that matches your router bit’s centre.
- Measure from the bit centre to the pivot hole. This distance is your radius (550mm for an 1100mm diameter table).
- Mark the centre of your panel, drive a short nail or screw into it, and fit your trammel over it.
- Make three or four passes, increasing depth by about 6mm each time. Never try to cut full thickness in one pass.
The router gives a clean, smooth edge that needs minimal sanding. It’s the professional method and well worth making the jig.
Method 2: Jigsaw with Template Trim
If you don’t have a router, cut close to the line with a jigsaw (leave 3–4mm outside your line), then use a flush-trim router bit or a belt sander to work back to the line. You can also make a hardboard or MDF template of the exact circle and use a pattern bit to rout to the template edge. This method works fine but takes longer to finish cleanly.
Cut List: Four-Person Round Table (1100mm Diameter)
An 1100mm diameter is the sweet spot for four people — enough elbow room without dominating a room. Table height is standard at 740mm–760mm.
| Part | Qty | Material | Dimensions (mm) | Notes |
|---|---|---|---|---|
| Table top panel | 1 | 18mm hardwood ply or glued-up pine | 1100 dia. (cut from 1200×1200 sq) | Mark circle before cutting |
| Turned pedestal (bought) | 1 | Timber, pre-turned | 700mm height | Pine or hardwood from timber suppliers |
| Pedestal base | 1 | 18mm ply | 600×600mm | Can be octagonal or round |
| Apron sides (if using 4-leg) | 4 | 19×70mm DAR pine | 400mm long | Cut curved on inside face |
| Legs (if using 4-leg) | 4 | 70×70mm DAR pine | 710mm long | Allow for taper if desired |
Leg Options: Pedestal vs Four-Leg Apron
Turned Pedestal (Easiest for a Round Top)
A central pedestal is the natural partner for a round top. It leaves the entire perimeter free — no legs in the way when you’re pulling a chair in. You can buy pre-turned pedestals from most timber yards or online suppliers. Look for one rated to hold dining table weight; cheap decorative ones won’t cut it.
Attachment is straightforward: bolt a mounting plate to the underside of the pedestal, then screw up into the table top from below. Pre-drill and use 40mm screws — don’t go so deep you poke through the top surface.
Four Legs with an Apron
Four legs on a round top is more complex because you can’t use standard butt-jointed corners — the apron needs to curve, or you use a smaller square subframe set in from the edge. The key attachment method here is figure-8 clips. These small metal clips slot into a routed groove in the apron and screw up into the underside of the top. They allow the top to move with seasonal wood expansion without cracking. Use one clip every 200–250mm around the apron.
Step-by-Step Build Process
- Prepare your panel. If gluing up solid timber boards for the top, glue and clamp them, then let cure for 24 hours. Flatten with a hand plane or run through a drum sander if you have access to one. If using ply, check for voids and fill if needed.
- Cut the circle. Use your router trammel as described above. Work in 6mm passes. Keep the router moving — don’t let it dwell or it will burn the edge.
- Sand the edge. Start at 80 grit with a random orbital or by hand, work through 120, 180. Keep the sander moving in circles to maintain the curve.
- Rout an edge profile. A roundover bit (6mm radius) softens the top and bottom edges and looks professional. Run the router around the edge with the trammel still attached or use a bearing-guided roundover bit handheld.
- Build the base. For a pedestal: bolt the column to its base plate, check it’s plumb. For four legs: cut mortise and tenon or use pocket holes to join legs to apron, check for square.
- Attach top to base. Pedestal: bolt up through mounting plate. Four-leg: fit figure-8 clips, screw into top.
- Sand everything to 180 grit, remove dust with a tack cloth.
- Apply finish. See finishing section below.
Finishing a Dining Table Top
Dining tables need a finish that can handle heat, spills, and regular wiping. You have two good options:
Dining-Grade Lacquer
Two-pack polyurethane lacquer or a quality single-pack waterborne lacquer gives a hard, durable surface. Apply three coats, sanding lightly with 320 grit between coats 1 and 2. Lacquer is more resistant to heat rings and water marks than oil, making it the better choice for families.
Hard Wax Oil
Products like Feast Watson Scandinavian Oil or Osmo Polyx Oil penetrate the timber and harden in the grain rather than forming a surface film. The result looks more natural and is easier to spot-repair — just sand back the damaged area and reapply. It’s less resistant to pooled water, so it suits households that are diligent about wiping spills quickly.
Either way, apply your first coat, let it dry fully, then sand with 320 grit and apply a second coat. Two to three coats is standard.
Common Mistakes to Avoid
- Cutting the circle in a single deep router pass — this stresses the router, burns the wood, and can cause splintering
- Gluing the top directly to the apron — solid wood moves with humidity, and a rigid glue joint will crack the top
- Skipping the edge profile — a sharp 90° edge on a dining table looks unfinished and is prone to chipping
- Applying finish without sanding back to 180 grit — any coarser grain telegraphs through the finish
A round dining table is a genuinely rewarding weekend project. The circle cut is the only tricky bit, and once you’ve made a trammel jig you’ll use it again and again. If you want proven, dimensioned plans with step-by-step diagrams for this and dozens of other furniture projects, Ted’s Woodworking has over 16,000 plans for every skill level — well worth checking out before you start cutting.