Hairpin legs are the single best thing that ever happened to beginner woodworkers. Instead of cutting mortises, drilling pocket holes for angled aprons, or sweating over joinery that took cabinet makers years to master, you bolt four metal legs to a slab of timber and you’re done. The result looks like it came from a furniture boutique in Fitzroy or Newtown — and it takes a single weekend. This guide walks you through building a full-size Australian standard coffee table: 120 cm long, 60 cm wide, 45 cm tall, using either a solid pine top or a plywood panel with edge banding.
Why Hairpin Legs Are Perfect for Beginners
Traditional coffee table builds require some form of apron-and-leg joinery — mortise and tenon, dowels, or at minimum pocket screws at compound angles. Every method adds complexity and opportunity for error. Hairpin legs eliminate all of that. The legs arrive pre-welded with flat mounting plates, and you attach them with four screws per leg directly into the underside of your tabletop. That’s it. No jigs, no special bits, no re-cuts if something goes slightly wrong.
There’s also a practical upside for first-time builders: if the legs are slightly uneven on an imperfect floor, most hairpin legs come with adjustable rubber feet. You can level the table after the fact without cutting anything.
Where to Buy Hairpin Legs in Australia
You have three good options depending on your budget and lead time:
- Bunnings: Sells basic 3-rod hairpin legs in black powder coat, usually 450 mm height for coffee table use. Affordable, available same day, but limited in rod diameter and colour options.
- Etsy AU sellers: Search “hairpin legs Australia” for locally made steel legs. Prices run AU$60–$120 for a set of four. Heavier rod diameter (12–16 mm) looks substantially better on a solid timber top.
- Online metalwork shops: Hairpin Legs Australia, Steel Legs, and similar Shopify stores offer 3-rod and 2-rod styles in raw steel, black, white, and raw brass. Turnaround is typically 3–7 business days. Best quality per dollar at this tier.
For a coffee table at this size, choose 450 mm legs (45 cm height). This lands you at the Australian standard seating height — comfortable from a standard sofa.
Materials and Cut List
You can build the top from 19 mm or 18 mm plywood (structural ply or birch ply for a cleaner face) or from glued-up 90 mm pine boards. The solid pine option is covered in the rustic build guide (Post 99). For this project, we’ll use 19 mm birch plywood with pine breadboard ends — a classic combo that adds rigidity and covers the ply edge grain.
| Part | Material | Length | Width | Thickness | Qty |
|---|---|---|---|---|---|
| Main top panel | 19 mm birch plywood | 1160 mm | 600 mm | 19 mm | 1 |
| Breadboard end (optional) | 90 × 19 mm pine DAR | 600 mm | 90 mm | 19 mm | 2 |
| Hairpin legs (450 mm) | Powder-coated steel | 450 mm | — | — | 4 |
Note on breadboard ends: They are optional. Skip them if you want a cleaner, more minimal look and plan to apply iron-on edge banding to the ply ends instead. Breadboard ends are better if you’re using solid timber for the top — they prevent cupping across the width over time.
Tools Required
- Circular saw or jigsaw (or have Bunnings cut the sheet for you — free with purchase)
- Random orbital sander
- Drill/driver
- Tape measure and pencil
- Clamps (4 minimum for gluing breadboards)
- Paintbrush or lint-free cloth for finish
Step-by-Step Build Instructions
- Cut the top panel. Have your sheet of birch ply cut to 1160 mm × 600 mm at Bunnings, or cut it yourself with a circular saw and a straight-edge guide. The 1160 mm length leaves room for the two 19 mm breadboard ends, bringing the final length to 1198 mm — close enough to 1200 mm.
- Cut the breadboard ends. Cross-cut two pieces of 90 × 19 mm pine DAR to exactly 600 mm. These cap the short ends of the ply panel.
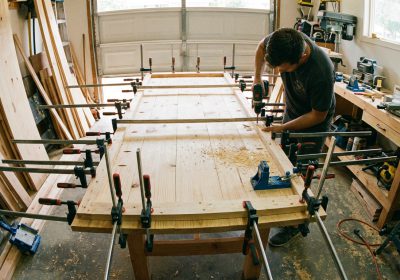
- Glue and clamp the breadboards. Apply PVA wood glue to the end grain of the plywood panel, press the breadboard on, and clamp for at least 90 minutes. Wipe excess glue immediately with a damp cloth. Reinforce with 50 mm countersunk screws through the breadboard into the ply edge — pre-drill to avoid splitting.
- Sand the top surface. Start with 80 grit if there are mill marks or surface defects. Progress through 120, 180, and finish with 220 grit. Sand with the grain for the final two grits. After 180 grit, wipe the surface with a damp cloth (raises the grain), let it dry completely, then sand again at 220. This prevents grain raising after you apply finish.
- Mark hairpin leg positions. Flip the top upside down. Set each leg 40–50 mm in from each corner, both directions. Mark the mounting holes through the leg plate with a pencil.
- Drill pilot holes and attach legs. Drill pilot holes to the depth of your mounting screws (usually M5 × 16 mm included with the legs). Drive the screws firmly but do not over-torque — you’re going into 19 mm ply, and the threads strip easily. If you’re building a solid timber top thicker than 32 mm, longer screws give better holding power.
- Apply the finish. Danish oil and hardwax oil are the two best choices for a beginner’s first table.
Finishing: Danish Oil vs Hardwax Oil
Danish oil (Feast Watson, Organoil) penetrates the timber fibres and hardens inside the wood rather than sitting on top. It gives a natural, low-sheen finish that feels warm to the touch. Apply with a lint-free cloth, wipe off the excess after 15–20 minutes, and let it cure for 24 hours between coats. Two to three coats is standard. It’s easy to touch up when scratched — just re-apply to the affected area.
Hardwax oil (Rubio Monocoat, Osmo Polyx) is a premium single-coat option. One thin coat applied with an applicator pad provides both colour and protection in one step. It cures in 24–48 hours and is completely repairable. More expensive per tin, but a 350 ml tin of Rubio Monocoat will do 4–6 coffee table tops. Ideal for birch ply because it enhances the pale gold colour without turning orange the way polyurethane does.
Avoid water-based polyurethane on birch ply for your first build — it raises grain aggressively and requires careful application to avoid brush marks.
Legs Placement Tips
The 40–50 mm inset from each corner is a starting point. If your top is solid timber and wide (over 500 mm), move the legs in slightly further on the long axis — 80 mm from the short ends — to reduce the visual overhang. This also shifts the weight distribution and makes the table feel more stable when someone leans on one corner.
Once the legs are attached and the finish is cured, flip the table right-side up, check all four feet are making contact with the floor, and adjust the rubber feet as needed. The whole build — from raw sheet to finished table — should take about 4–5 hours including drying time.
Ready for More Complex Builds?
The hairpin leg coffee table is a perfect confidence-builder. Once you’ve finished this one, you’ll have the core skills — accurate cutting, surface prep, and finishing — to tackle joinery-based designs with aprons, drawers, and even hand-cut dovetails. If you want a library of 16,000 step-by-step woodworking plans to work through at your own pace, Ted’s Woodworking has every design from beginner to advanced, all with cut lists and measured drawings. It’s the fastest way to go from one good build to a full workshop capability.